Grease Be Gone: Master the Art of Cleaning Enamel Oven Trays
Posted on 23/05/2025
Grease Be Gone: Master the Art of Cleaning Enamel Oven Trays
Enamel oven trays are a staple in kitchens worldwide, known for their durability and smooth, non-porous surfaces. However, over time, daily baking and roasting can leave your enamel oven trays coated in stubborn grease and burnt-on residue. Don't let that baked-on grime intimidate you! In this comprehensive guide, Grease Be Gone: Master the Art of Cleaning Enamel Oven Trays, you'll learn the secrets to restoring your trays to their original sparkle with easy, effective, and safe cleaning methods.
Table of Contents
- Why Clean Enamel Oven Trays Regularly?
- Understanding Enamel Oven Trays
- Basic Pre-Cleaning Preparation
- How to Remove Light Grease and Stains
- Deep-Cleaning Solutions for Stubborn Baked-On Grease
- Natural Cleaning Hacks: Eco-Friendly Approaches
- What NOT To Do: Protecting Your Enamel Trays
- Tips for Regular Maintenance
- Troubleshooting Common Issues
- Frequently Asked Questions
- Conclusion: Enjoy a Grease-Free Cooking Experience
Why Clean Enamel Oven Trays Regularly?
Keeping your oven trays clean isn't just about aesthetics. Here's why maintaining spotless enamel oven trays matters:
- Prolonged Lifespan: Regular cleaning preserves the protective enamel coating, preventing rust and deterioration.
- Prevents Flavors Mixing: Old grease can impart unwelcome tastes and odors to new dishes.
- Healthier Cooking: Removing burnt-on food reduces potential health hazards associated with carbonized fats and oils.
- Improved Oven Efficiency: Clean trays promote even heat distribution for better baking results.
Ignoring routine cleaning allows layers of grime to build up, making future cleaning much more difficult. Now, let's understand what makes enamel oven trays unique.
Understanding Enamel Oven Trays
Enamel oven trays consist of a core metal--typically steel or cast iron--coated with a layer of vitreous enamel. This enamel layer creates a hard, glossy, and non-porous finish that resists rust and facilitates cleaning. Still, it has unique care requirements:
- Non-Reactive Surface: Safe for baking acidic foods like tomatoes and citrus.
- Scratch Sensitive: Harsh abrasives can damage the glossy finish, exposing the tray to rust.
- Resistant to Most Stains: But burnt-on grease and sugars can be stubborn without proper cleaning techniques.
To fully benefit from your enamel trays, knowing the best cleaning practices is essential.
Basic Pre-Cleaning Preparation
Before jumping into advanced cleaning methods, a few preparatory steps will make the process smoother:
Step 1: Allow the Oven Tray to Cool
- Never attempt to clean an oven-hot or even warm tray. Sudden temperature changes can cause the enamel to crack.
Step 2: Remove Loose Debris
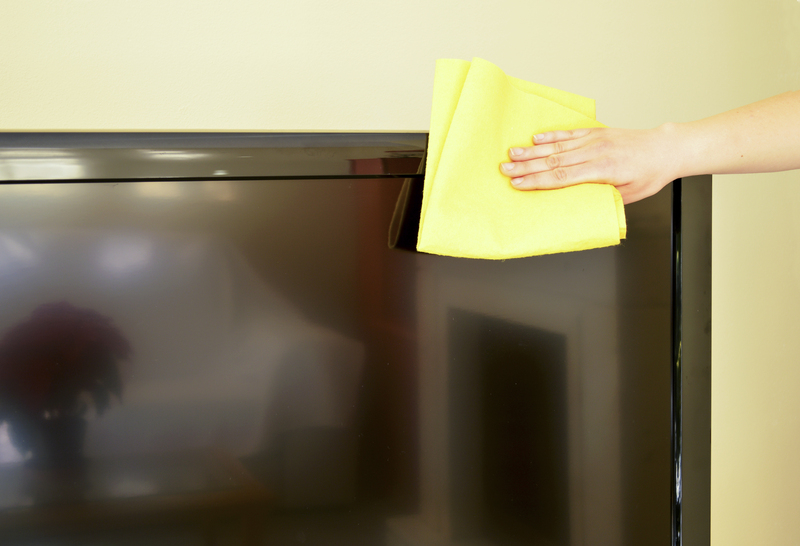
- Using a soft, damp sponge or cloth, wipe away any loose crumbs or residue. This prevents scratching during deeper cleaning.
Step 3: Soak for Softening
- For quicker results, fill your sink with hot water and a squirt of mild dish soap. Let the tray soak for 15-30 minutes.
Pro Tip: Always use soft sponges or cloths, never steel wool or abrasive pads!
How to Remove Light Grease and Stains
For everyday cleaning, mild strategies are often enough. Here's a step-by-step guide to tackling light grease and surface stains on your enamel baking trays:
- Prepare a Cleaning Solution: Mix a few drops of gentle dishwashing liquid with warm water in your sink or basin.
- Wipe the Tray Down: Dip a non-abrasive sponge into the water and gently scrub the tray's surface in circular motions.
- Tackle Corners and Edges: Use a soft nylon-bristle brush or an old toothbrush for stubborn buildup along corners and tray edges.
- Rinse Thoroughly: Rinse under clean running water to remove all soap residue.
- Dry Immediately: Dry with a lint-free towel to prevent water spots and preserve the shiny enamel finish.
For slightly tougher grease, sprinkle a little baking soda onto the damp tray before scrubbing -- the gentle abrasive action boosts cleaning power without scratching the enamel.
Deep-Cleaning Solutions for Stubborn Baked-On Grease
Sometimes, standard cleaning isn't enough to beat that persistent, burnt-on grease. When you face truly tough stains, try these tried-and-tested deep-cleaning hacks for enamel oven trays:
1. The Baking Soda and Vinegar Method
- Sprinkle a thick layer of baking soda evenly over the soiled areas of your tray.
- Spray or drizzle white vinegar (distilled) over the baking soda. Watch as it fizzes and bubbles--this reaction helps loosen stubborn grease.
- Let sit for 20-30 minutes. The mixture will soften the grime.
- Gently scrub with a soft sponge or nylon brush in circular motions.
- Rinse thoroughly and dry.
2. Oven-Safe Soak and Low-Heat Technique
- Spread a layer of baking soda and dish soap on the tray, add a little water to make a paste.
- Place the tray in the oven at 80-100?C (175-212?F) for 15-20 minutes (never higher, as the enamel can crack at high temps!).
- After cooling, the residue should wipe off easily with a sponge.
3. Commercial Enamel Cleaner
- Choose a cleaner specifically formulated for enamel surfaces. Never use harsh oven cleaners or products with strong acids/alkalis.
- Follow the manufacturer's instructions closely for the most effective and safe results.
For the best finish, always rinse thoroughly to remove any chemical residues and dry with a soft towel.
Natural Cleaning Hacks: Eco-Friendly Approaches
If you prefer chemical-free cleaning methods for your enamel oven trays, consider these all-natural alternatives:
Lemon Power
- Cut a lemon in half and rub the cut side directly on the greasy areas.
- Allow the lemon juice to sit for 10-15 minutes, then wipe away with a damp cloth.
- Lemon's natural acidity breaks down grease and leaves a fresh scent.
Salt and Baking Soda Paste
- Create a gritty paste with equal parts coarse salt and baking soda, then add enough water to bind.
- Apply to tough spots, scrub gently, then rinse and dry.
Hydrogen Peroxide and Baking Soda
- For deeply ingrained grime, mix baking soda and a small amount of hydrogen peroxide to form a paste.
- Spread on the tray, let sit for an hour, then scrub and rinse thoroughly.
What NOT To Do: Protecting Your Enamel Trays
To ensure long life and pristine condition for your enamel trays, keep these tips in mind:
- Do not use steel wool, wire brushes, or metal scrapers — these will scratch the enamel!
- Avoid harsh oven cleaners or bleach, as these can erode the enamel surface.
- Never move from hot oven to cold water — this thermal shock can crack the enamel.
- Don't stack trays while wet; always dry completely before putting away to prevent water stains or sticking.
- Avoid dropping or knocking enamel trays, as impacts can cause chips or cracks.
Protecting your enamel's finish means cleaning smarter, not harder.
Tips for Regular Maintenance
- Clean your tray after every use -- the sooner, the easier! Fresh grease wipes away more readily than baked-on buildup.
- Line your tray with parchment paper or reusable silicone mats to minimize cleaning needs and protect the enamel from acidic or sticky foods.
- Inspect for chips regularly; discontinue oven use if you spot exposed metal, as this can rust or react with food.
- Store trays apart, using felt or cloth between, to prevent surface scratches.
Troubleshooting Common Issues
Even with proper care, some issues can arise. Here's how to handle them:
- Persistent burnt-on stains: Repeat a baking soda and vinegar soak, or apply a commercial enamel-safe cleaner as directed.
- Sticky residue: Use a paste of baking soda and dish soap, leaving it on for 30 minutes before scrubbing gently.
- White spots: Mineral deposits from hard water; remove with diluted white vinegar, then rinse and dry well.
- Surface chips: If only minor, keep dry and avoid acidic foods; consider retiring the tray if the core metal is visible or rusting.
Frequently Asked Questions
Can you use dishwasher tablets to clean enamel oven trays?
- While some recommend this as a hack, dishwasher tablets can be too harsh for enamel. Stick to the methods above for the best results.
Is it safe to use baking soda on enamel trays?
- Yes! Baking soda is just abrasive enough to lift grease, but gentle enough not to scratch enamel when used with a soft sponge.
How to remove old, stubborn carbon stains?
- Apply a paste of baking soda and hydrogen peroxide, let it sit overnight, and scrub gently in the morning.
Can you use a Magic Eraser on enamel oven trays?
- Magic Erasers are mildly abrasive. Test on an inconspicuous area first, or use sparingly with gentle pressure.
What should I do if the enamel starts to chip?
- Discontinue using the tray for food, as exposed metal may rust or leach into food. Use it for grilling or crafts instead, or recycle responsibly.
Conclusion: Enjoy a Grease-Free Cooking Experience
Mastering the art of cleaning enamel oven trays is all about understanding the right techniques and using gentle, effective cleaners. From quick daily wipes to powerful overnight soaks, following these tips will keep your enamel baking trays looking and performing like new for years. Remember, prevention and gentle care are your best allies for a spotless, safe cooking experience.
Do you have a favorite grease removal trick for your enamel trays? Share your tips and experiences in the comments below!